1.) Start from our Zapier Template: https://zapier.com/app/editor/template/1671255
2.) Use the "Video Rendered" Trigger by selecting it
3.) Connect your Pitchlane account

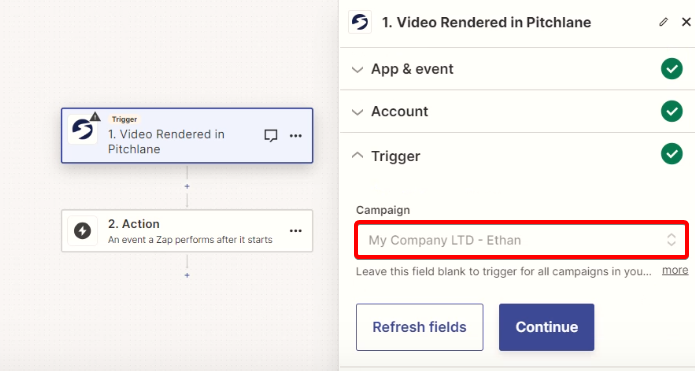
4.) Select the trigger category and then select the campaign you generated your Pitchlane content through
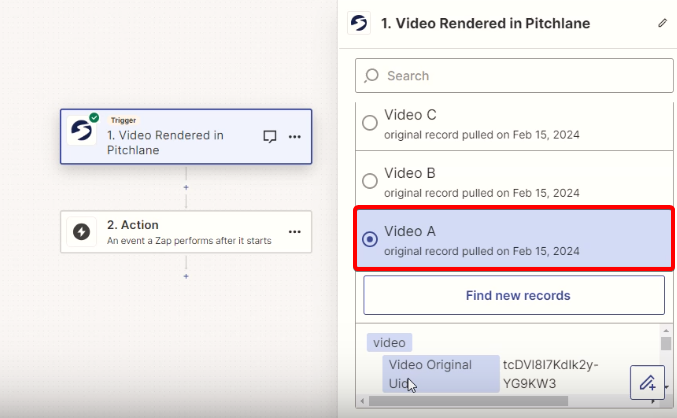
5.) Select a test prospect to use.
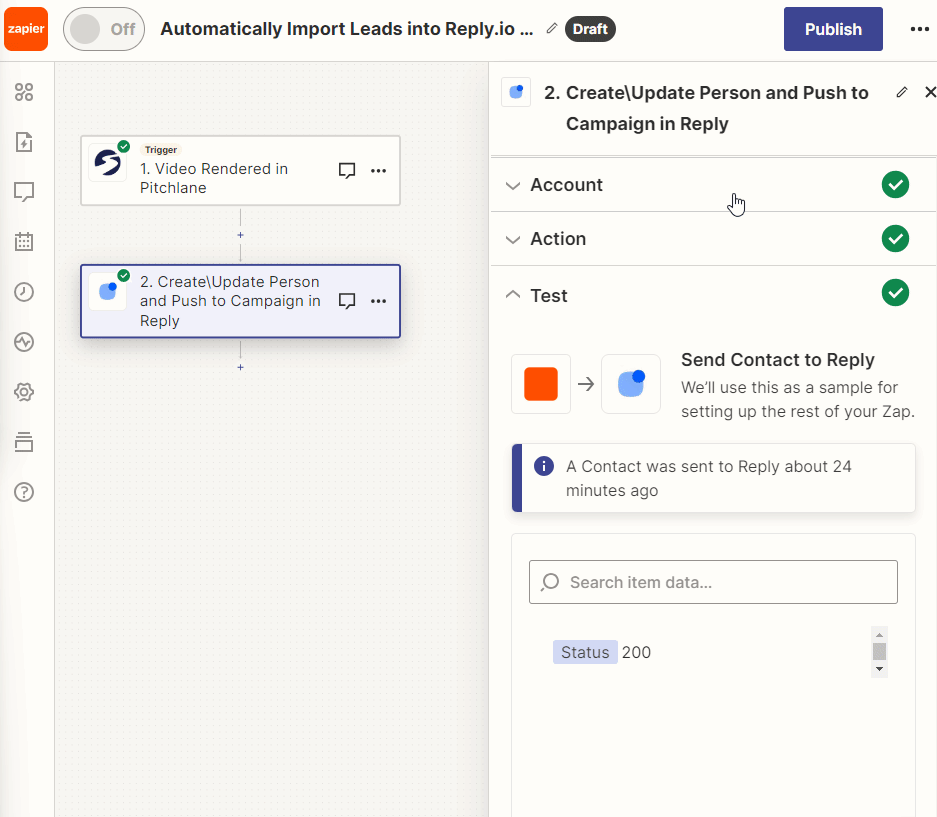
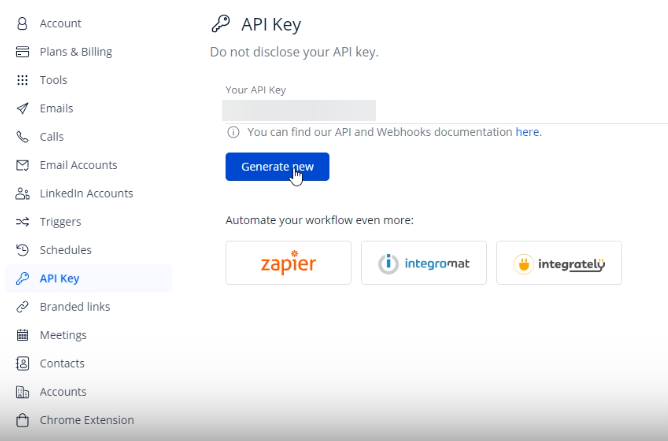
6.) Select the Reply.io action, and connect your Reply.io Account. You can find your API key on the settings page in Reply.io
7.) Select your Main/Primary Campaign in Zapier

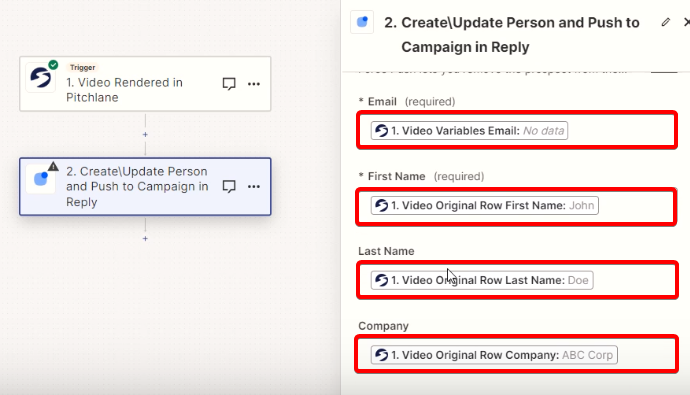
8.) Populate the fields with your data from Pitchlane
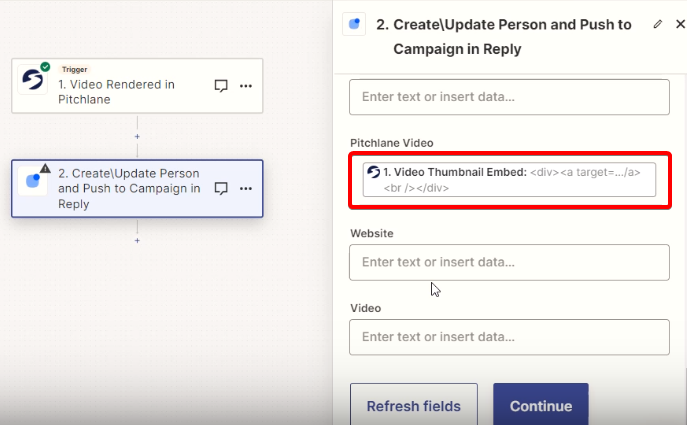
9.) Ensure your Pitchlane Video/ThumbnailEmbed variable is assigned correctly. Note: this will be dependent what you named the variable in the previous guide: https://help.pitchlane.com/article/148-how-to-use-pitchlane-with-reply-io?preview=65ce4276b668985dce304130
10.) Hit Test then Publish your Zap!